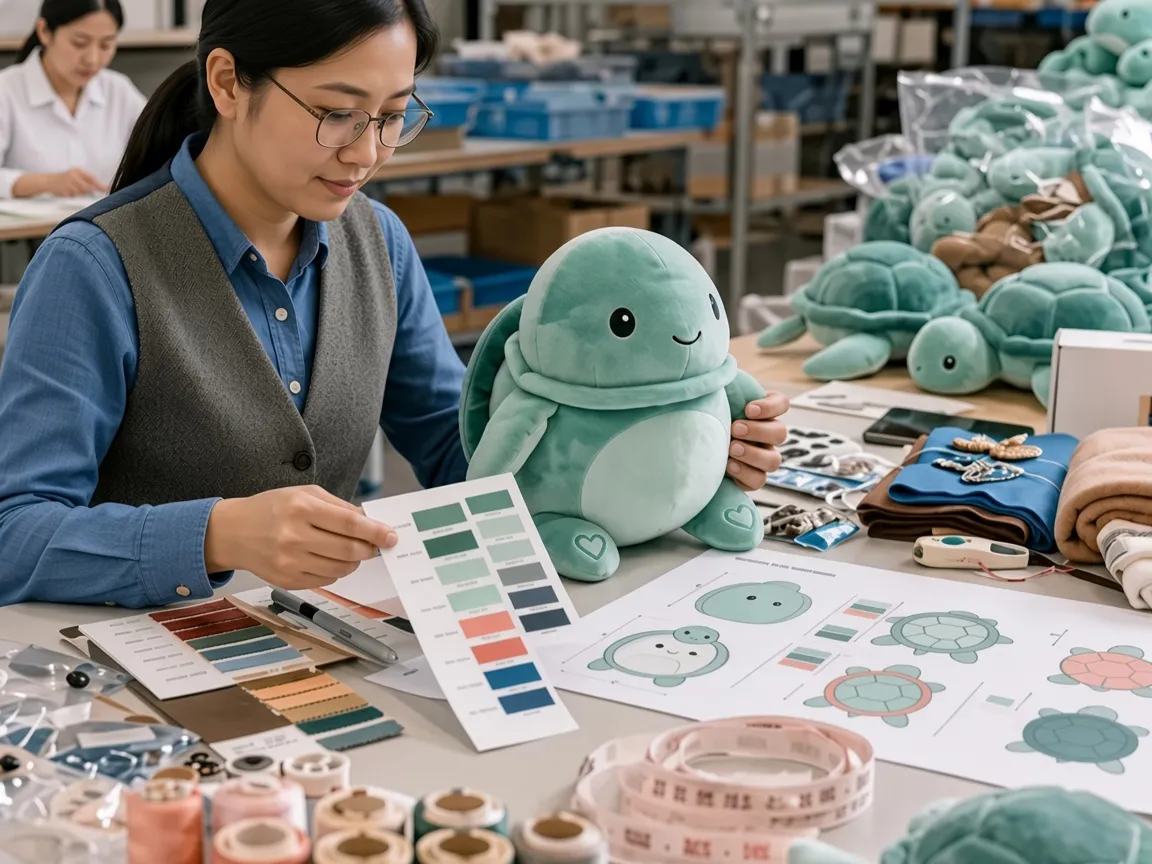

Beautiful character art often dies in the sample room. The best plush character design tips start with one fact: fabric is not a drawing. We see warped faces, inflated heads, drifting symmetry, and poses that will not stand.
This list draws on our sample room work and the failure modes we see most often at first-round sample review. Follow the teardown below to build patterns that pass round-one inspection.
Key Takeaways
Ten design decisions decide whether cute art survives fabric, stuffing and inspection. These are the ones that cut revision rounds fastest.
- Silhouette before surface detail. Fill the character black and shrink it to 80×80. If the ears, head, tail or body outline stop reading, fix the masses before touching face print.
- Simplify micro-details. Thin lines, tiny marks and stacked appliqué layers add panels and alignment risk; merge them into shapes that read at arm's length.
- Match fabric to the face. Use 3–6 mm pile for detailed faces and 220–280 GSM fabric for the body. Mirrored panels must share one grain direction.
- Size eyes as a pair. The two eyes together should span 25–35% of face width. Use embroidery for under-3 toys to remove small-parts risk.
- Keep seams on colour breaks. Use 5–6 mm seam allowances and hold ±2 mm on mirrored parts. Fewer panels mean fewer matching points that can drift.
- Approve physical references. Sign off Pantone swatches and embroidery sew-outs on the actual fabric, never from a monitor.
- Decide the pose before the pattern. Test balance on a fully stuffed prototype and add a weighted base if the shape cannot sit flat.
- Lock commercial terms early. Stock fabric runs start at 500 units, two revision rounds are included, and the compliance path should be agreed before the tech pack is signed.
10 Plush Character Design Tips That Survive Sampling
Get your mascot from sketch to golden sample faster – clear advice on turnaround sheets, panels and colour specs.
1. Simplify Details Before Sampling Starts
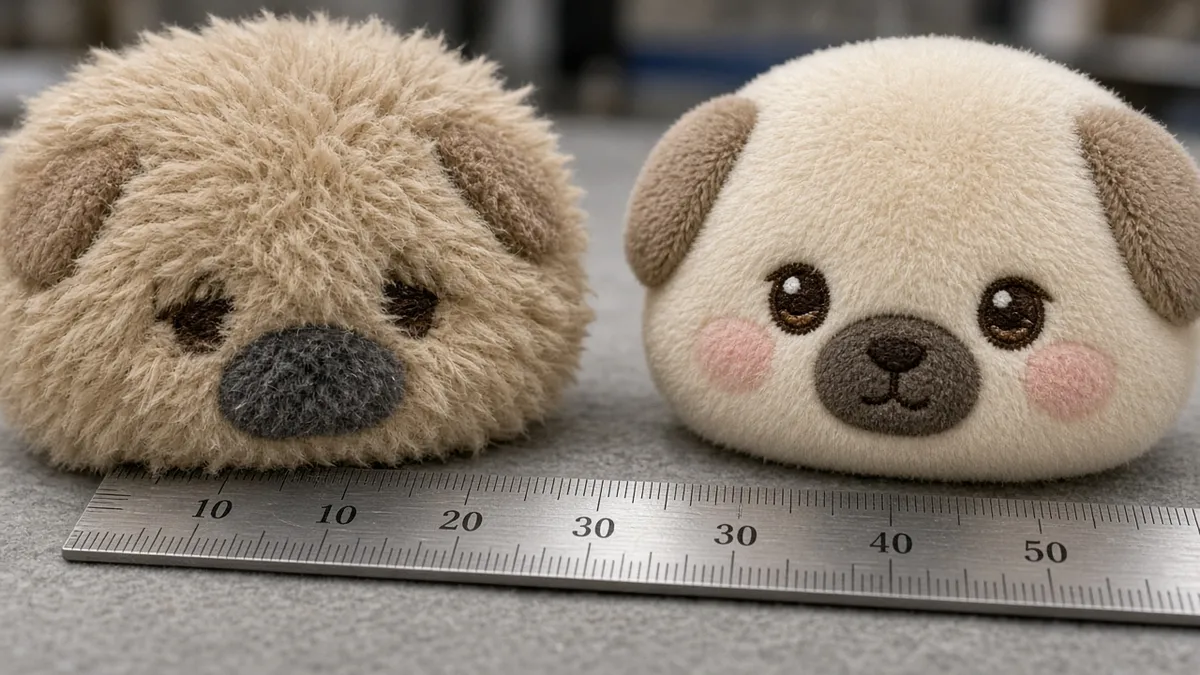
Your art looks sharp on screen. Then the first plush sample comes back muddy. That is the cheapest plush lesson: remove fragile details before round one. These details fail first:
- Ultra-thin lines
- Tiny markings
- Stacked appliqué layers
- Small separated shapes inside seam or pile zones
Each one adds a panel, another embroidery pass, or another alignment risk. In our sample room, a 4 mm logo can disappear into a minky pile, and a three-layer appliqué can shift a couple of millimetres after stuffing. Both send the sample into a revision loop.
The fix is simple. Combine micro-details into larger shapes that read at arm's length. Make one bold eye patch instead of five tiny spots. Merge stacked layers into a single printed or embroidered block. Before you approve art, ask our sample room whether each mark survives pile depth, seam allowance, and embroidery pull.
A gaming studio once sent us a dragon mascot with a dense layer of tiny chest scales. The embroidery needles tore the minky backing during round one. We merged the small marks into two bold patches, cut the machine passes, and moved the design closer to a wearable sample.
🚀 Actionable Insight: Merge every micro-detail into one read-at-distance shape before sampling, then confirm pile and seam limits with your factory.
2. Protect the Silhouette Before You Protect the Surface Detail
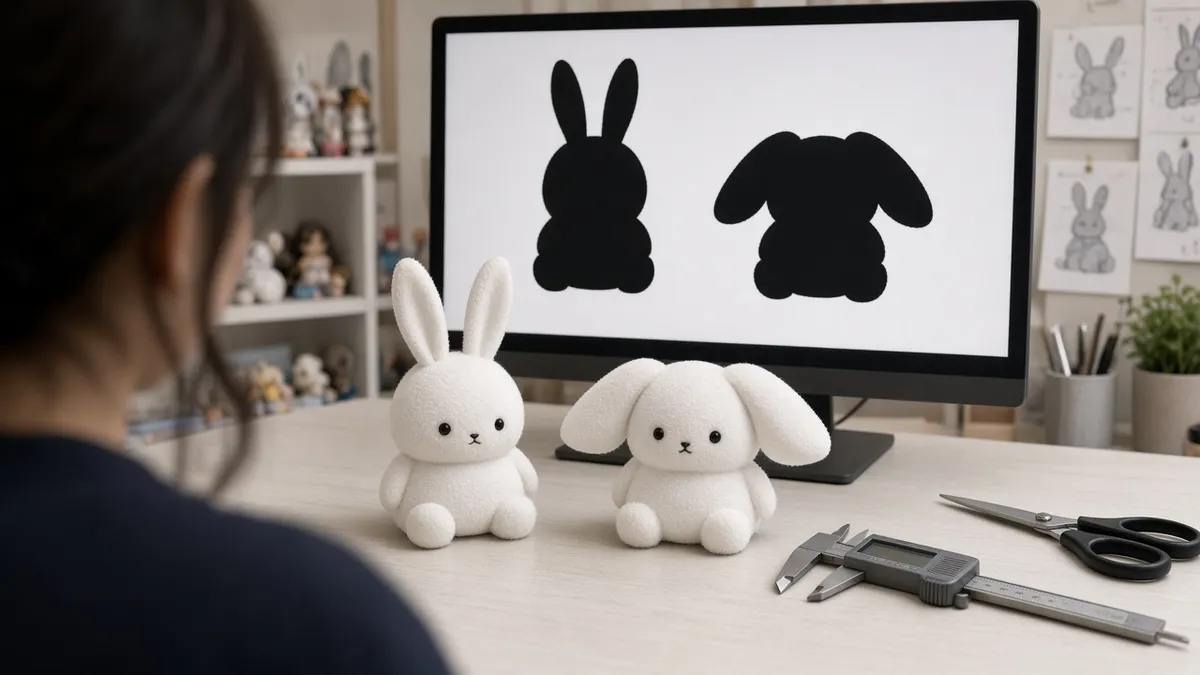
At 80×80 pixels, your character either reads or it does not. That check drives every art review in our sample room. We fill the art as one solid black shape, shrink it to thumbnail size, and step back. If we cannot name the character from ears, tail, hair mass, or body outline alone, it still leans on surface art. No embroidery pass will fix that.
Build big masses and negative space first. Lock recognizability in ears, head shape, tail, hair, or signature accessories before you debate face print, texture, or small accents.
We watched a bunny sample fail this check. The face print was clean, but the ears vanished at 80×80. We enlarged the ear mass and widened the gap between head and body. The next sample read from across the room.
We run every concept through the 80×80 silhouette test before sampling. If the black shape fails, we stop the art review. Fix the masses first. It saves pattern time and revision rounds, and it is the same logic behind our toy prototyping methods.
🚀 Actionable Insight: Fill the character black, shrink it to 80×80, and fix the ears, head, tail and body outline before any surface detail.
Morry Mo, Custom Plush Toys & Cotton Dolls Manufacturer
3. Choose Proportions That Survive Stuffing
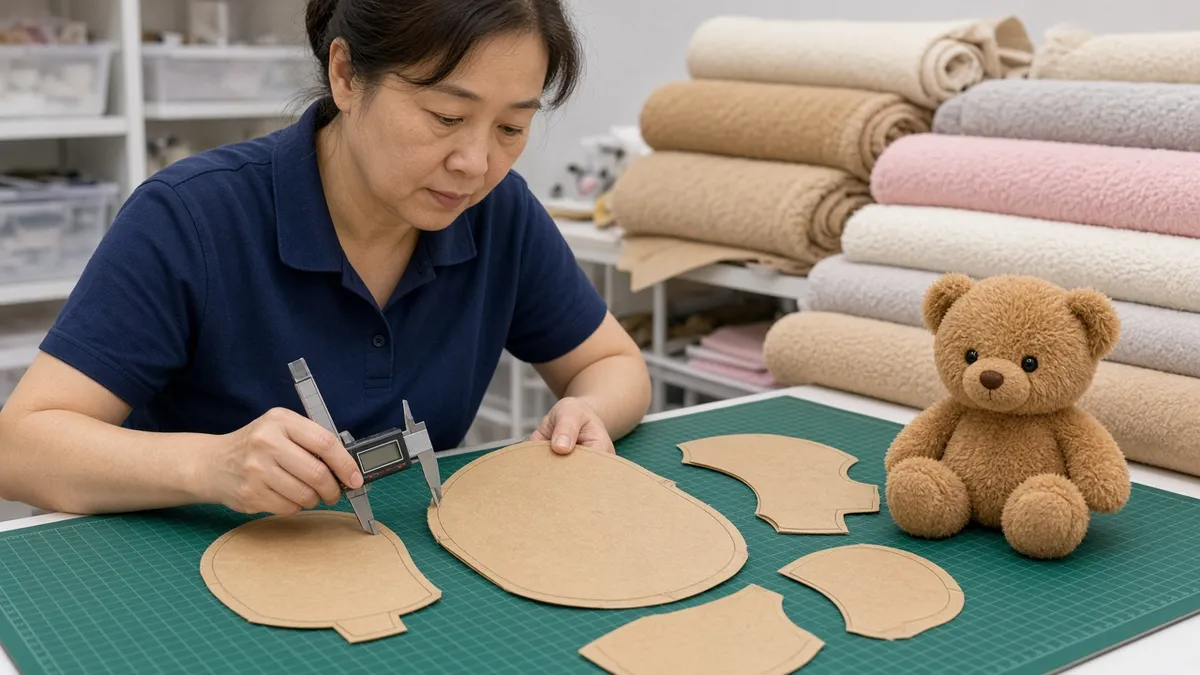
A cute sketch can still fail the stuffing machine. Start with the head-to-body ratio — head width to body width — because it decides how the toy behaves after filling.
In our sample room, consumer plush lands between 1:1 and 1:1.3. Infant lines skew rounder, near 1:1, so the head stays soft and stable. Collector plush runs slimmer, but only with a firm inner support.
Pick the ratio for the person using the toy. Baby products need a wider base and shorter limbs. Display plush can take a leaner body because it sits on a shelf, which is why types of plush toys follow different proportions.
Blown 7D polyester fiberfill expands fabric along the stretchy cross-grain. That expansion makes a sewn head look wider and flatter than your 2D sketch. Our pattern team trims 8 to 10 percent off the horizontal cheek pattern before cutting, and adds chin darts to lock the vertical profile under stuffing pressure.
On a recent bear project, we cut 10 percent off head width and the sample matched the art. Skipping that step usually costs one full revision round.
🚀 Actionable Insight: Lock the head width allowance before you cut the first pattern.
4. Send a Vector Turnaround Sheet, Not Just Character Art
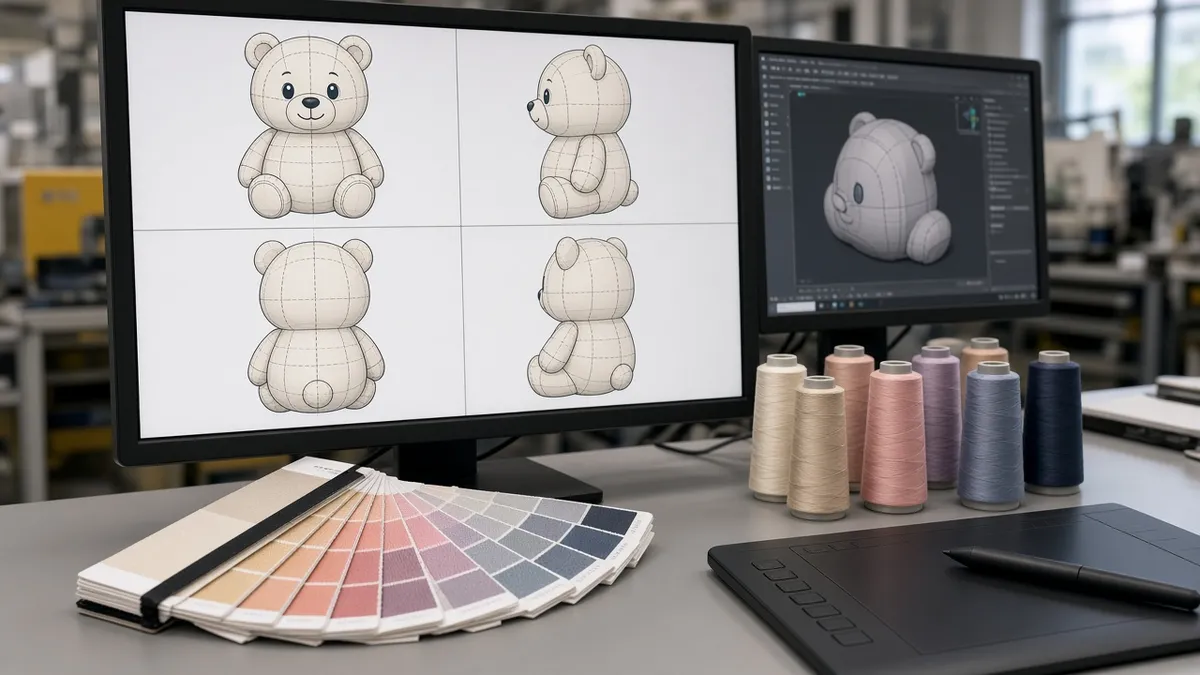
A single front view is not a spec. It is a guess. You already simplified details and tested the silhouette. Now lock the handoff. Send a vector turnaround sheet, not loose character art.
Include front, side, and back views, plus top or bottom when the shape demands it. Add overall size, head width, key measurements, material zones, embroidery zones, and callouts for mirrored versus asymmetrical features.
One front-view illustration forces the factory to invent the rest.
Follow a standard plush tech pack protocol to eliminate sample room guesswork. Build facial art in layered Adobe Illustrator files and convert custom fonts to outlines. Keep dimension lines, Pantone TCX callouts, and grain arrows on separate editable layers. Our CAD engineers import these vector layers directly into ET Pattern Design software.
A client once sent one flat JPEG. We lost days guessing ear height and tail seam. After the file moved to a layered vector turnaround with editable notes, round one passed. The old handoff cost days; the new file prep took two hours.
🚀 Actionable Insight: Use this checklist: front, side and back views (add top or bottom where needed), editable measurements, material and embroidery zones, and symmetry callouts.
5. Match Fabric Pile, GSM, and Grain to the Character
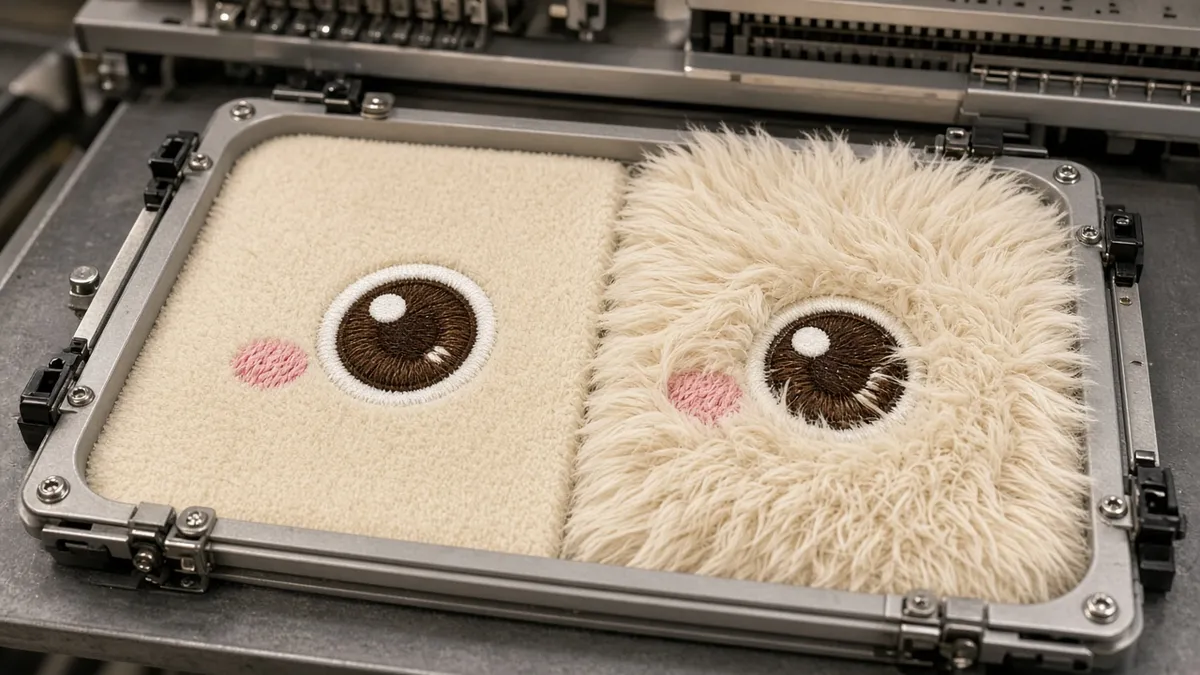
Most design teams pick fabric by color. That habit can warp a face. Match pile, weight, and grain to the character. Here is the matrix we run in our sample room:
| Character need | Fabric spec |
|---|---|
| Detail-heavy faces, small eyes | Short pile, 3–6 mm |
| Soft infant and toddler lines | Lower-pile minky, under 5 mm |
| Mid-pile everyday characters | 6–8 mm pile |
| Shaggy monsters, faux fur | Long pile, 8–25 mm |
| Base body and limbs | 220–280 GSM |
A longer pile swallows stitches. In a side-by-side test, the same eye embroidery sat crisp on a 4 mm pile and blurred on an 18 mm one.
Grain matters just as much. Our sample room lead puts it plainly: "Cut the left cheek along the weave and the right cheek against it, and the face twists. The eyes drift 2 to 3 mm and the mouth reads tense." Mirrored panels must share one grain direction. Mark it on the pattern, not only on the art sheet.
On a polar bear run, a temporary cutter ignored the grain arrows. The stuffing machine stretched one cheek horizontally and warped the snout, and the defect only showed up at inspection. The sewing team had to unpick and recut part of the run over a weekend.
🚀 Actionable Insight: Add grain arrows to every mirrored face panel and test-sew 4 mm pile first.
6. Place Eyes and Facial Features for Plush, Not Paper
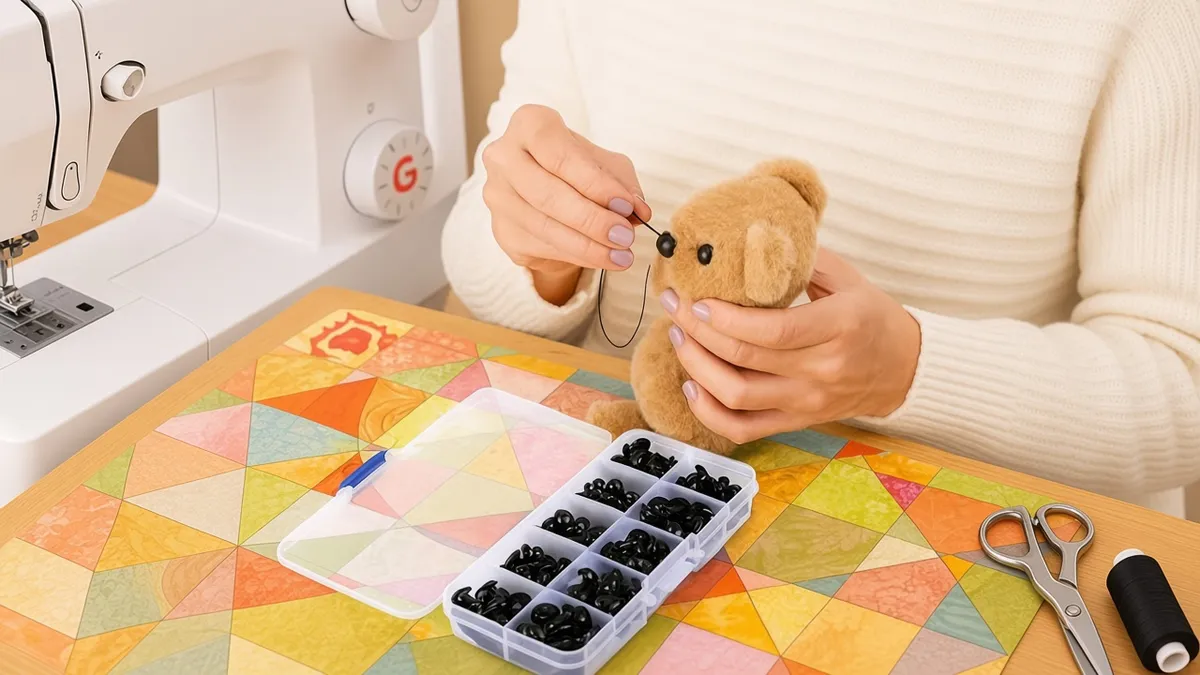
Plush faces read at 30 cm, not monitor scale. In our sample room, we size the eye pair so the two eyes together span 25–35% of face width. On a 90 mm face, a 25 mm eye pair reads at 28%, and the character reads.
At 18%, the bear looked tired. Test spacing on the sewn head, not the flat pattern. Mirror the sample, shoot it head-on, and compare the gap to the art. Cuteness and symmetry win. Do not copy painterly placement that ignores seam pull.
Build choice follows age grade:
- Embroidered features leave no hard small parts. We default to embroidery for infant and toddler lines.
- Safety eyes need locking washers and pull tests.
- Printed elements work on short piles only.
For under-3 toys, embroidery clears small-parts risk and speeds EN71 review. It is also the method most brands settle on after reading our guide to embroidery on plush toys.
We rebuilt one toddler bear run because 10 mm safety eyes sat too close to a seam. Embroidery added a few days but reduced small-parts risk.
🚀 Actionable Insight: Size the eye pair at 25–35% of face width, confirm spacing on a sewn sample, and use embroidery for under-3.
7. Engineer Seams, Panel Count, and Seam Allowances Early
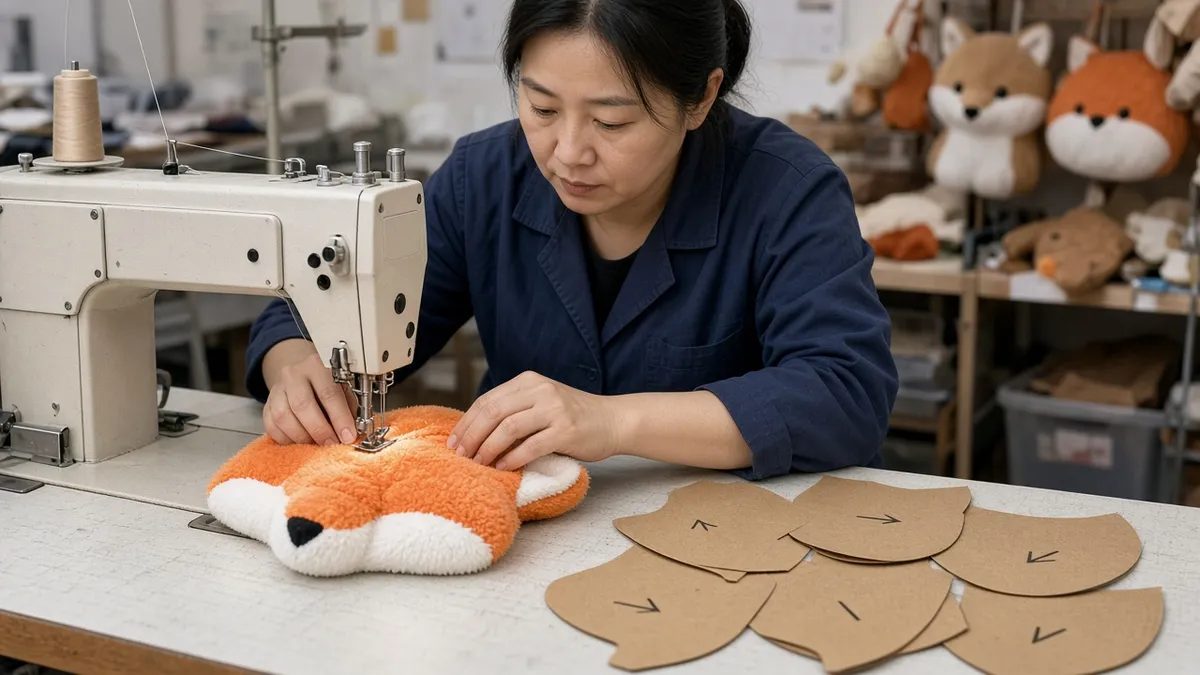
Seams are visible lines. Put them on color boundaries or texture changes and they disappear. Cut a smooth face into three visible segments and every sample looks cheap.
Our pattern makers set 5 to 6 mm seam allowances for every cut, and confirm the exact number with production before cutting. Wide allowances eat up narrow shapes during sewing. On a narrow cat tail, a thick seam can block the turning tube and shorten the finished piece. Widening the paper pattern by a few millimetres fixes the next cut.
Panel count drives rejection rate and unit cost. Symmetry, tension, and twisted seams are our biggest first-round rejection causes. More panels add matching points that can drift. We hold ±2 mm placement tolerance so mirrored halves match. The same panel logic shows up in our guide to plush toy construction methods.
On one fox project, we merged a nine-panel head down to five and kept the seam on the cheek color break. First-round rejections dropped sharply, and the sewing line ran faster per unit.
🚀 Actionable Insight: Draw every seam before you approve art. Keep allowances at 5–6 mm, hold ±2 mm on mirrored parts, and merge any panel that does not hide on a color or texture line.
8. Lock Color, Embroidery, and Material Specs in the Tech Pack
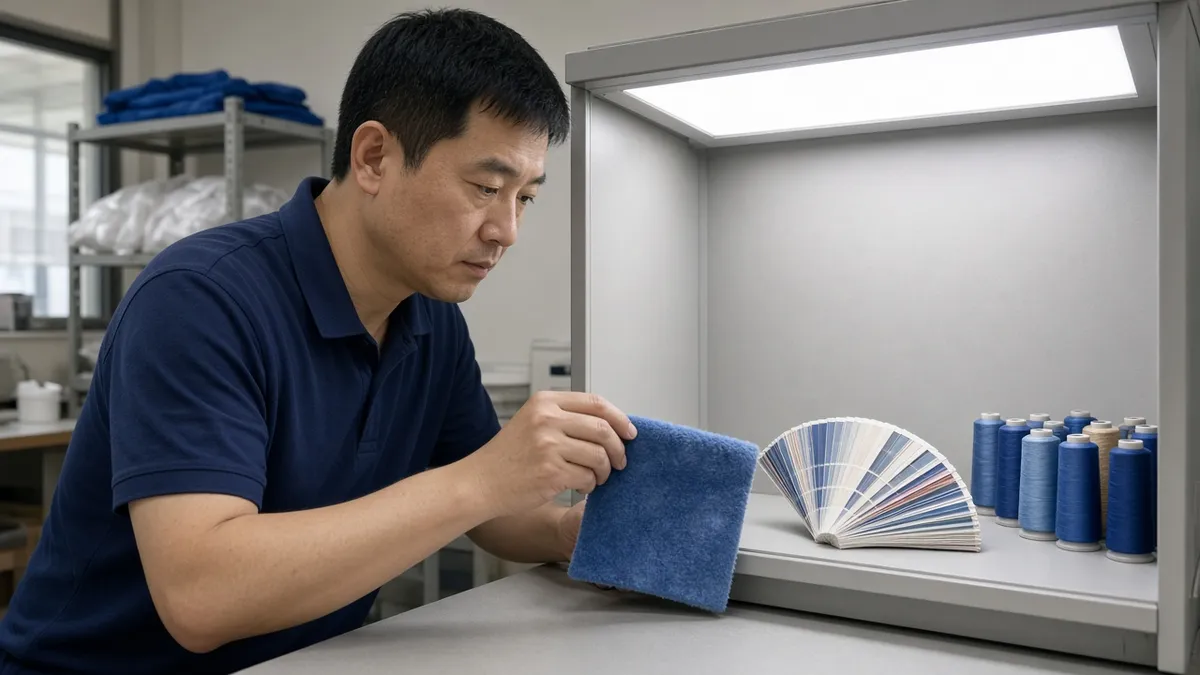
A screen is not a colour reference. A sample comes back muddy, and the factory says it matched the Pantone code. You approved color on a monitor. The plush pile shifts color under lighting and pile direction. Dye lots vary. Lock physical references before cutting fabric.
Make these non-negotiable:
- Pantone code plus a physical swatch on the actual fabric. We sign off every dye lot against the swatch, not a screen.
- Thread brand, code, and a sewn sample on final fabric. Digital art hides how digitizing changes line art. A 2mm line becomes a 4mm satin stitch.
- Fabric supplier, spec, and pile direction. Mark pile direction on the pattern.
Require sew-out approval on actual fabric before production. Send DST or PES files, not JPEGs. Digitizing adds pull compensation and stitch density. Clean on screen reads chunky on plush.
A buyer once approved a sky-blue hex code on an uncalibrated monitor. Our dye house ran a physical lab dip first and checked it under D65 retail lighting. The minky swatch shifted purple in real life, and mailing that physical swatch caught the shift before bulk cutting.
🚀 Actionable Insight: Never approve colour or embroidery without a physical sewn sample.
9. Design the Pose, Weight, and Balance for Shelf Stability
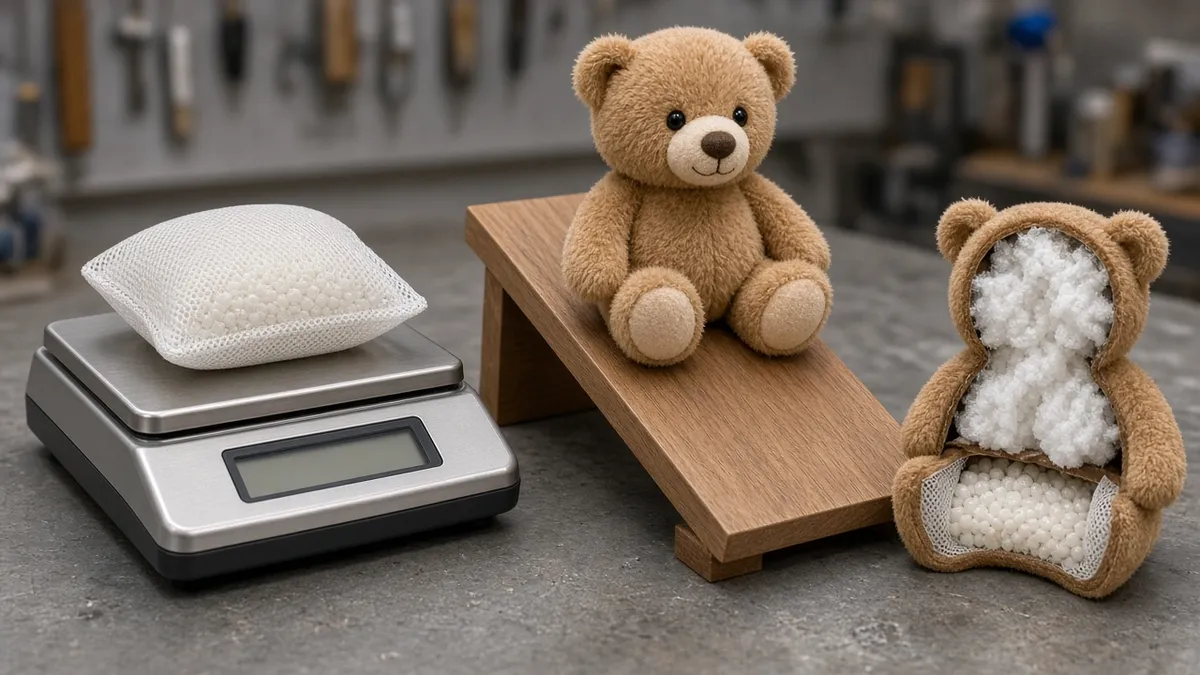
Cute art can still tip forward once fill goes in. Before cutting a pattern, we force one pose call: sitting, standing, or lying down. Head-heavy characters pitch forward unless the base shape, fill distribution, or weighted bottom is engineered on purpose. A faithful standing pose often reads better in art. A stable sitting pose usually wins on shelf and in sampling.
Pellets or a weighted base improve balance but change softness. Pose choice changes panel geometry. A standing version needs wider feet, a deeper belly, or internal support.
A sitting version hides balance in the seat panel and reads cleaner at retail. We test center of gravity on a filled mockup before sampling. If the base cannot sit flat, we change the pose or add weight.
Always test balance on a fully stuffed prototype before you approve the pattern. On a recent anime mascot, the oversized head kept tipping forward. We sewed a sealed PE pellet pouch into the bottom gusset; it passed the client's shelf test without changing the silhouette.
🚀 Actionable Insight: Pick the pose before the pattern, test balance on a filled prototype, and add a weighted base if the shape cannot sit flat.
10. Plan MOQ, Safety Compliance, and Revision Cycles From Day One
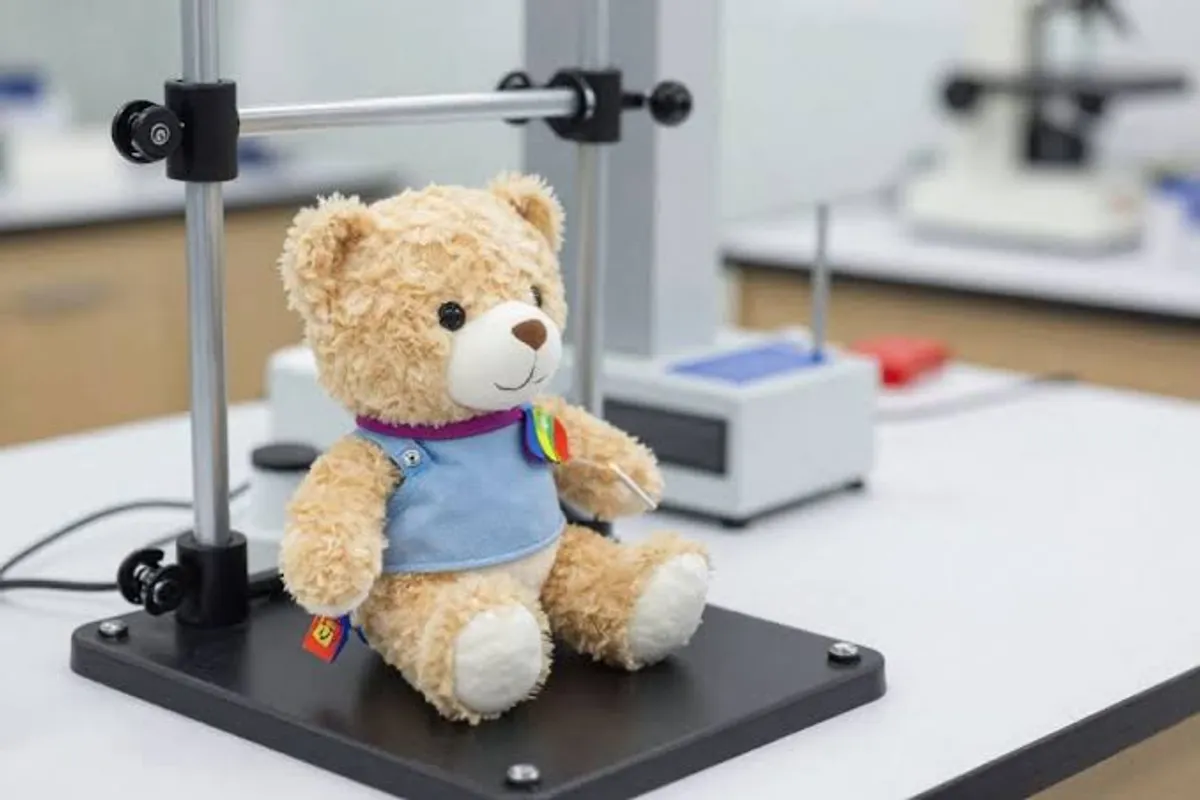
You can pass every silhouette and seam check, then lose the launch on commercial terms. The final point: MOQ is not one number. Stock minky colors allow 500-unit runs, while custom vat dyeing requires a higher per-color minimum.
Two revision rounds are included at no extra cost, and sample fees are credited toward your first production order.
Every material choice dictates your testing path: ASTM F963-23 and CPSIA in the US, and EN 71 plus REACH in the EU. We source OEKO-TEX Standard 100 fabrics to support material safety testing. The certificate covers restricted substances in the fabric, not the finished toy, so finished-product testing still applies.
Our compliance team also formats your permanent CPSIA tracking labels with batch codes before bulk sewing starts. A late label change can add a week. A safety eye change can force a new pull test.
A client once wanted a small run with custom dye. We moved to stock fabric and a woven label, kept the run at 500 units, and avoided the longer dye-lot lead time.
🚀 Actionable Insight: Confirm MOQ, sample fees, revision limits, and compliance path before you approve the tech pack.
How to Build a Plush Sample: From 2D Turnaround to Factory Handoff
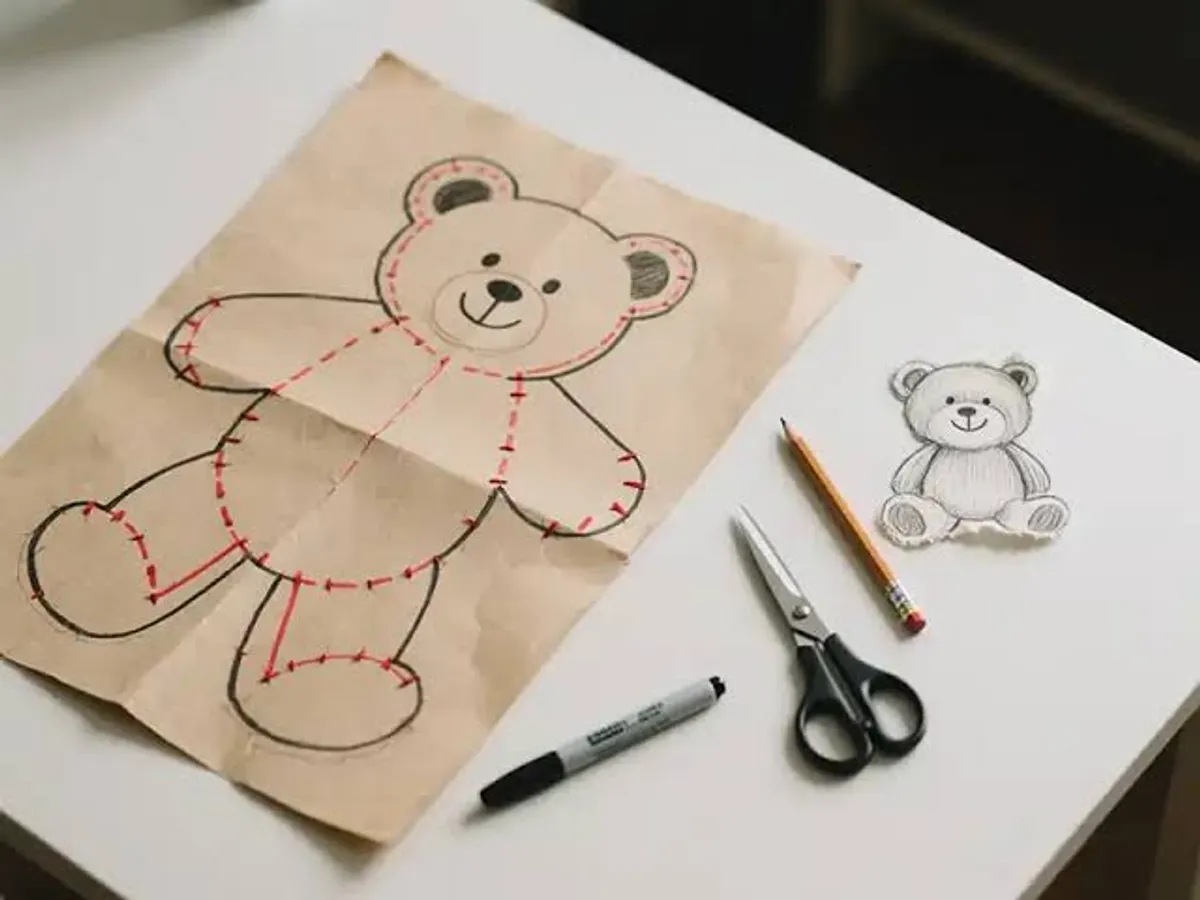
We run this teardown in our sample room. It turns flat art into a golden sample and cuts revision rounds. Apply the 80×80 silhouette test from Tip #2 before you start.
Annotate the 2D Turnaround Sheet
Start with a layered vector turnaround, not a JPEG. Mark front, side, back, and top views. Then:
- Fill the silhouette black. Circle the masses that drive recognition: ears, head, tail, body shape.
- Mark symmetry lines. Draw center lines on the face, ears, and body. Note every mirrored feature so it can be checked on the sewn sample.
- Split the character into major panels. Keep seams on color or texture breaks. Merge panels that add no shape.
- Add exact seam allowances. We use 5 to 6 mm and confirm the number with production. Write each number on the pattern, and add a ±2 mm tolerance note on mirrored eyes.
- Draw grain arrows on every mirrored panel. They must run in the same direction. Our sample room lead says: "Flip grain on one cheek and the eyes drift 2 to 3 mm. The mouth reads tense."
Run the Sample Room Sequence
Review the art against the notes. Convert shapes into panels. Assign fabric and embroidery methods. Sew the first prototype. Run symmetry and tension checks. Mark revisions on photos, not text. Lock a golden sample.
If tension pulls the mouth, adjust panel width or seam allowance before round two. Photograph the sewn sample head-on. Annotate every mirrored feature on the photo and mark drifts in red. The factory fixes what it can see. Keep every callout editable. Do not flatten notes into the art.
When we audit first-round prototypes against a ±2 mm symmetry tolerance, most failures trace to eye drift, twisted cheek seams, reversed fabric grain, or tight thread tension. Almost all of them come from one missed callout, not bad art. Eye or mouth drift means mirrored features miss center. Twisted seams show as a pulled cheek.
Factory Handoff Checklist
- Layered vector turnaround with editable notes
- Panel list with seam allowances and grain arrows
- Fabric and embroidery specs on actual fabric
- Symmetry tolerance at ±2 mm
- Signed golden sample with a version number (GS-v1, GS-v2), locked files, reference dimensions and photographs
- Revision photo set with red marks
Sign the physical golden sample, not a photograph. Record its version number, store the locked pattern file with it, and keep the reference dimensions and photos in the same folder. Every unit off the line is measured against that sample.
Send your 2D art to our engineering team under a signed mutual NDA for a red-lined DFM review and exact unit quote. Review our toy production process and custom plush manufacturing pages before cutting fabric.
People Also Ask About Plush Character Design Tips
-
How do I turn a 2D character into a plush toy?
Start with a layered vector turnaround, not one front drawing. Show front, side, back, and top views. Mark panel splits, 5 to 6 mm seam allowances, and grain arrows on mirrored parts.
Our sample room then builds the pattern, sews a prototype, and checks symmetry and tension. Expect one to two revision rounds before a golden sample. The 2D-to-3D teardown above shows the exact sequence.
-
What files should I send to a plush manufacturer?
Send layered AI or SVG files for facial art. Add a PDF turnaround with editable measurements, material zones, embroidery zones, and Pantone swatches. Include DST or PES files for embroidery. Keep notes as text outside flattened art. A JPEG-only handoff can cost days of guesswork in our sample room. Use the file checklist in Tip #4 before you send.
-
What fabric is best for detailed plush faces?
Use short pile fabric, 3 to 6 mm, for detailed faces. It holds small embroidery and prints cleanly. In a side-by-side test, the same eye embroidery stayed crisp on a 4 mm pile and blurred on an 18 mm pile. Use 220 to 280 GSM for the body. Match grain direction on mirrored panels. For infant lines, choose a lower-pile minky.
-
Should I use embroidery, printing, or safety eyes for plush faces?
Choose by age grade and pile height. Use embroidery for infant and toddler toys because it leaves no hard small parts. Safety eyes need locking washers and pull tests, so reserve them for older age grades. Printing works on short pile only. In our sample room, we default under-3 faces to embroidery. It adds days but removes small-parts risk.
-
What MOQ should I expect for custom plush toys?
Stock fabric and simple builds can start at 500 units. Custom dye lots, extra materials, or plastic accessories push MOQ higher. In our experience, off-season production slots can help small runs. Confirm sample fees, revision limits, and deduction policies before you approve art. See our MOQ guide for current ranges.
-
How many sample rounds are normal for plush manufacturing?
Plan for one to two revision rounds before a golden sample. Most first-round failures trace to one missed callout. Four rounds usually means the art or spec needs a reset. Mark every fix on photos with red lines.
-
Which safety standards matter for plush toys sold in the US or EU?
For the US, plan for ASTM F963 and CPSIA. For the EU, plan for EN 71 and REACH. Age grade and small parts drive the test path. Under-3 toys need no small parts. Safety eyes need pull tests. Send your turnaround sheet for a design for manufacturing review. Our toy safety standards guide walks through both test paths before you cut fabric.