Prototyping is not a single step. It is a risk management tool designed to prevent expensive tooling errors.
I compared the top toy prototyping methods by speed versus detail. You will learn to match the right fidelity to your custom toy manufacturing timeline. This ensures you secure a signed physical sample compliant with ASTM F963 specifications before mass production begins.
Talk to our engineering team if you need a quote.
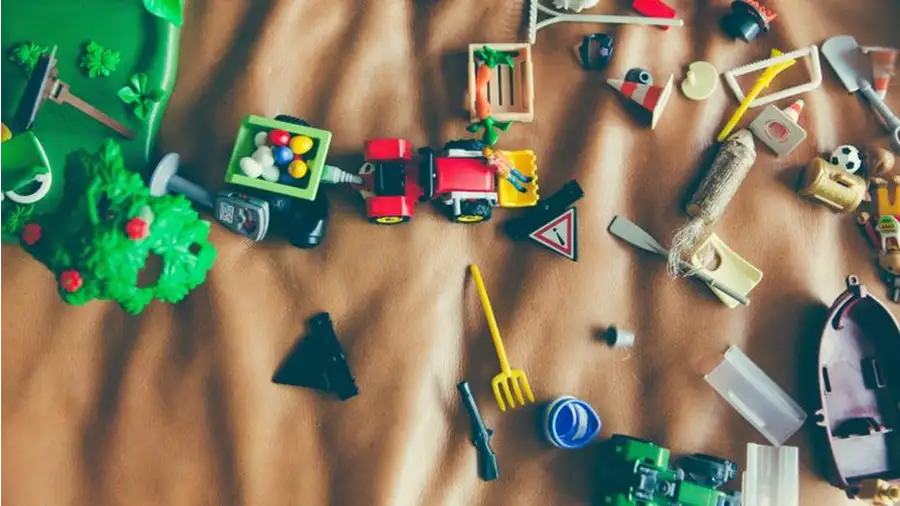
Top 8 Toy Prototyping Methods
Steal these methods to save money and speed to market.
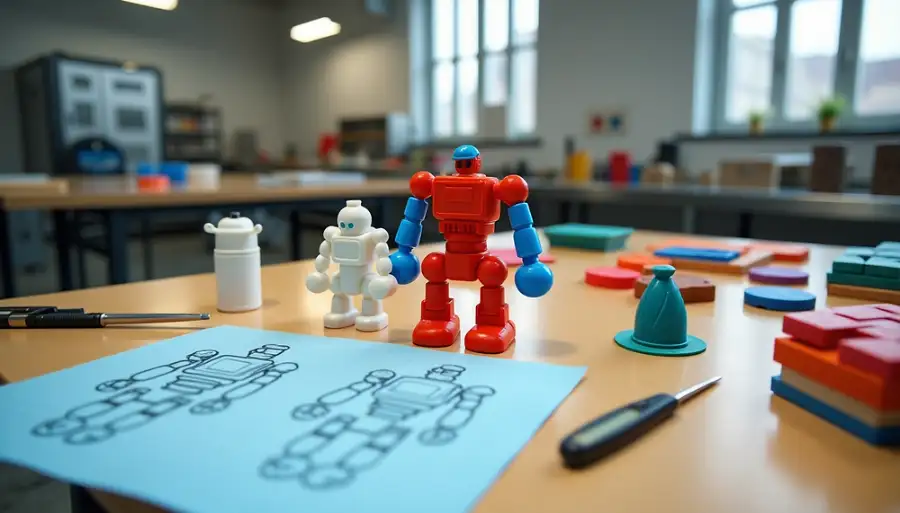
1. SLA vs FDM 3D Printing (Fastest Path to Mechanical Truth)
3D printing is the fastest way to validate fit before you commit to expensive steel tooling. It turns CAD files into physical objects in hours, catching design errors while they are cheap to fix.
The Two Methods We Use
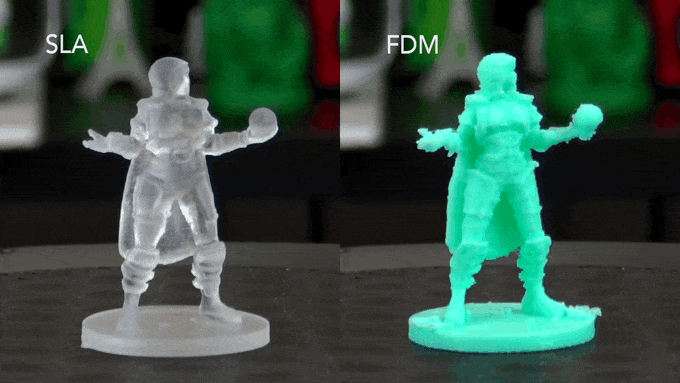
- SLA (Stereolithography) for Detail: Using light to cure liquid resin, SLA is essential for action figures. It captures sharp edges and fine facial textures that nozzle-based printers blur. According to ISO/ASTM standards, this method delivers superior surface quality for visual verification.
- FDM (Fused Deposition Modeling) for Structure: This method melts filament to build layers. It is best for large items like vehicle chassis. FDM parts allow for thicker walls and withstand structural handling better than brittle resin.
Speed and Selection Rules Expect samples in 24 to 48 hours. Use SLA for aesthetics (doll faces, texture). Use FDM for scale and structure (playsets, trucks).
What This Prototype Answers: Use these samples to verify specific engineering constraints:
- Snap-fit Clearance: Does the latch click securely?
- Screw Boss Alignment: Do mounting holes align with the internal PCB?
- Articulation: Does the arm rotate without hitting the torso?
- Battery Doors: Does the cover slide and lock geometry work?
- Packaging Volume: Does the assembled unit fit the target box?
A Warning on Compliance: 3D printed resins are not final production plastics. They are brittle and will shatter on impact. While useful for design checks, they cannot pass the drop tests required by ASTM F963.
Printed parts also lack the chemical safety of final polymers. Refer to our guide on types of plastic toys for production material selection. Never use prototypes for formal age grading guidelines or certification.
🚀 Actionable Insight: Request your prototype with a neutral grey primer finish. Grey highlights surface imperfections and geometric flaws much better than translucent or white resin, saving you from expensive mold revisions later.
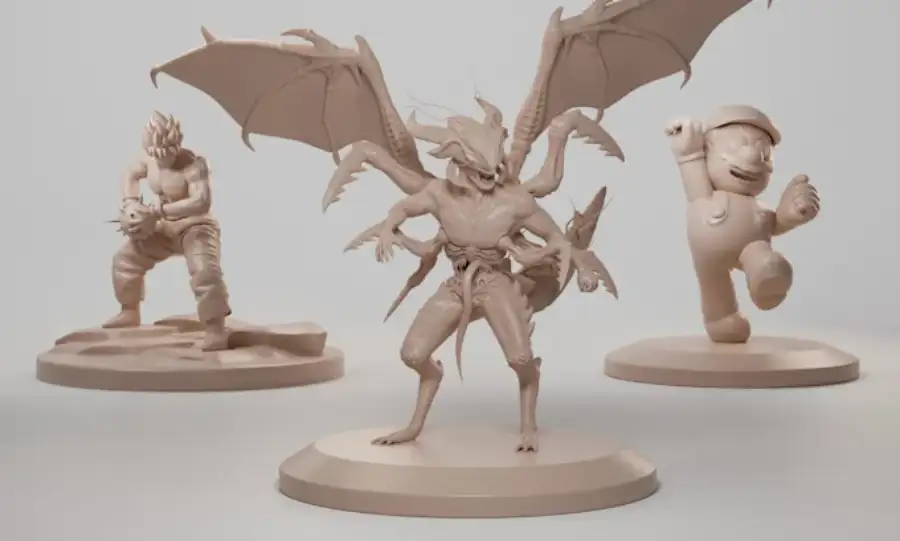
2. Hand Sculpting (Clay/Wax): Best for Organic Characters
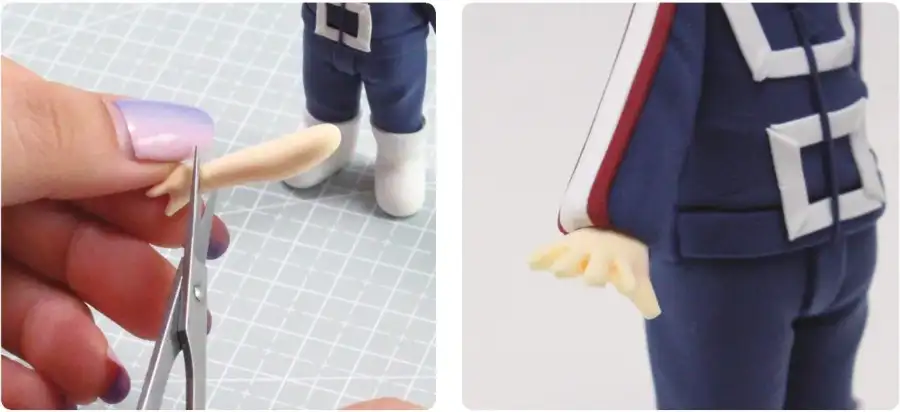
Digital modeling wins for mechanical fit, but clay is superior for organic aesthetics. Screens often flatten depth, making it difficult to judge volume. A physical clay or wax maquette allows you to verify "shelf appeal" instantly. You can confirm the character's silhouette reads clearly from six feet away and test how the figure feels in a child's hand.
Why choose analog sculpting:
- Creative Speed: Experienced sculptors can rough out dynamic poses 3x faster than digital modelers can rig a character.
- Believable Detail: Clay captures soft muscle transitions and facial expressions that often look stiff or robotic in CAD.
- Gravity Check: You can immediately test balance and weight distribution without running a simulation.
The Handoff: From Desk to Factory
Clay is fast to create but impossible to tool directly. You must digitize the art to enter the toy production process:
- 3D Scan: Use structured light scanners to convert the physical model into a high-density point cloud.
- Digital Cleanup: Engineers import the mesh into software like ZBrush. We mirror the best side to fix symmetry drift and scale the figure to the exact production height.
- Engineering Prep: The mesh is converted to NURBS surfaces to add articulation joints and calculate draft angles for injection molding.
Risks to Flag Clay lacks mathematical precision. Symmetry errors—like one arm being longer than the other—are inevitable. Do not use clay if the figure must fit inside a specific vehicle or hold a mechanical accessory. The tolerances will vary by millimeters, leading to costly tooling rework.
3. Digital 3D Sculpting and CAD
2D drawings leave room for interpretation. Digital files do not.
Treat your 3D file as the product itself. It serves as the instruction code for tooling machines and prevents expensive "guesses" about curve depth or joint tightness.
Most professional toys require a hybrid design approach.
- Digital Sculpting (ZBrush): Use this for the "skin" surfaces. It handles organic details like hair texture, muscle definition, and facial expressions.
- CAD (SolidWorks/Creo): Use this for the "bones." It defines engineering features like screw posts, internal ribs, and articulation joints.
The "Mold-Ready" Checklist
Before sending files for a toy ODM/OEM quote, audit these four points. This prevents weeks of revision delays.
- Part Separation: Split the head, torso, and limbs into separate meshes. Do not send one solid block.
- Draft Angles: Add a 1 to 2 degree slope to vertical walls. Standard injection molding guidelines confirm that plastic parts stick in steel molds without this draft.
- Wall Thickness: Maintain consistent thickness, usually 1.5mm to 2.5mm. Uneven walls cool slowly and cause visible "sink mark" dents.
- Assembly Constraints: Define exactly how parts connect. Specify fasteners for durability or snap-fits for assembly speed.
IP and Version Control
Never email a file named Final_v2_REAL. Sloppy naming leads to manufacturing the wrong version. Use strict date codes in filenames, such as Project_Torso_2024-05-12_v04.
Protect your leverage during the sourcing phase. Share neutral formats like STP (defined by ISO 10303) for the initial quote.
Only release native source files (ZTL or SLDPRT) after you sign an NDA. This is a critical step in how to find a toy manufacturer you can actually trust.
4. Silicone Molding + Urethane (Vacuum) Casting (Best for 10–50 'Works-Like' Samples)
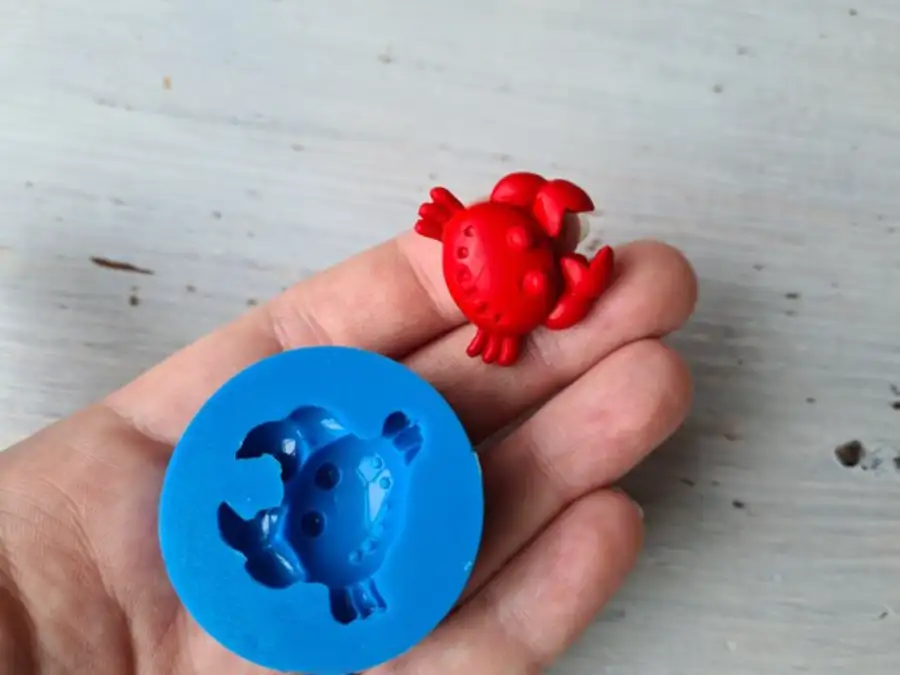
You do not need steel tools to get parts that feel like production plastic. For pilot runs of 20 to 50 copies, silicone molding bridges the gap between fragile 3D prints and expensive injection molding.
The Process We start with a high-resolution SLA master model. We pour liquid RTV (Room Temperature Vulcanizing) silicone around it to form a soft mold. After curing, we cut the mold open and fill the cavity with liquid urethane resin.
- Vacuum Degassing: We cycle liquid silicone in a vacuum chamber. This boils out trapped air to ensure the mold surface is smooth, not pitted.
- Registration Keys: We cut locking shapes into the silicone edge. This forces the mold halves to align perfectly and prevents "flash" lines.
- Thin-Stream Pour: We inject resin in a hair-thin stream to prevent air bubbles from entering the mix.
Material Selection: Shore Hardness Urethanes mimic production materials. Select your hardness based on the ASTM D2240 standard:
- Shore A 30–50 (Soft): Best for tires or grips. Flexible molds allow easy demolding of undercuts but tear faster.
- Shore A 60–80 (Mid): Standard for action figures. It replicates the feel of ABS or PVC.
- Shore A 90+ (Firm): Best for rigid casings or gears.
The Economic Reality: Silicone molds are consumable. Chemical heat from curing resin burns the silicone surface. A single mold lasts for 15 to 25 shots before texture degrades. Suppliers like Smooth-On note that aggressive resins shorten this life further. If you need 100 parts, budget for four molds.
Best Use Cases: Use this for investor samples and destructive playtesting. Urethane parts have similar mechanical strength to production plastic, allowing you to find breakage hazards early. Note that urethane does not pass chemical safety labs. Formal compliance testing requires the final types of plastic toys intended for mass production.
🚀 Actionable Insight: If your design features deep undercuts, request a softer silicone mold (Shore A 20). This reduces stress during part removal and extends tool life by 10–15%.
5. CNC Machining (The "Truth" Method for Mechanisms)
3D prints often warp under heat or snap under stress. When you need to verify if a mechanism actually functions, you need the structural truth of CNC machining.
This subtractive process cuts parts from solid blocks of plastic or metal. Unlike layered 3D prints, CNC parts are isotropic, meaning they possess equal strength in all directions.
Use this method for functional components that competitors often ignore. It is the only way to test battery compartment doors with active snap latches that do not break instantly.
It validates friction in gear trains using real engineering plastics like POM (Acetal). It also produces PCB enclosures with precise screw bosses and clear windows polished to a glass-like finish.
Precision takes time. CNC prototyping typically requires 3 to 5 days, unlike the 24-hour turnaround of printing.
However, it offers superior dimensional confidence, often meeting ISO 2768 standard tolerances. If a CNC prototype jams, your design is flawed. If it works, your geometry is sound.
The "Perfect Part" Risk CNC parts are dangerously perfect. They lack the sink marks and knit lines found in injection molding. Use CNC to validate fit and geometry, then reference on types of plastic toys to understand production material behavior. While unnecessary for soft vinyl figures, this method is non-negotiable for rigid engineering verification.
6. Soft Tooling vs Hard Tooling (Prototype Injection Molds → Production Molds)
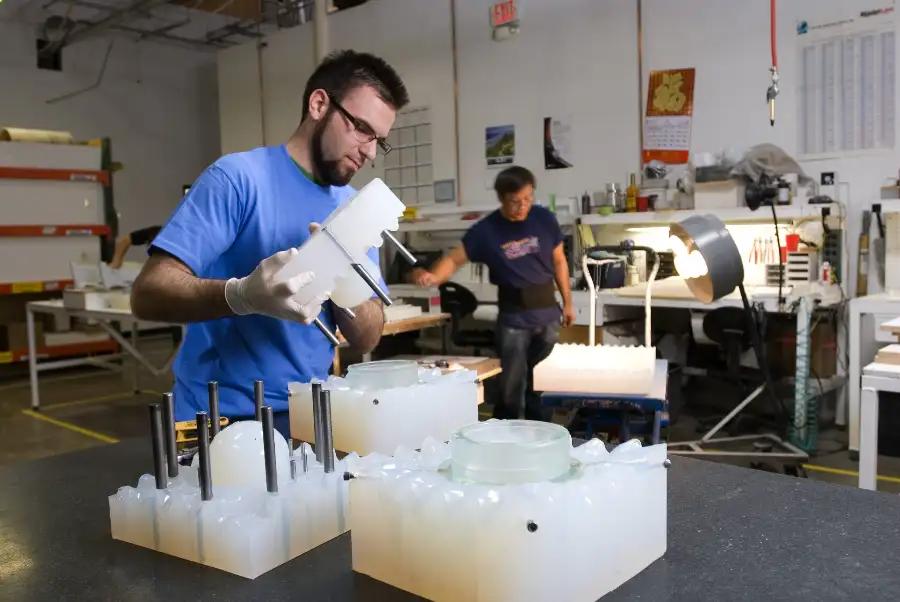
Cutting steel is a permanent commitment. If you discover a design error after the steel is cut, fixing it often costs as much as buying a new mold. Experienced brands use soft tooling to bridge the gap between 3D printing and mass manufacturing.
The Commercial Decision: Speed vs. Scale
You must balance upfront risk against unit cost and longevity.
- Soft Tooling (Aluminum): This is your validation tool. It costs 40–60% less than steel and cuts lead times to roughly two weeks. The softer metal holds tolerance for 500 to 2,000 units. Use this for pilot runs, crowdfunding fulfillment, or market testing.
- Hard Tooling (Steel): This is your long-term asset. It requires high upfront capital and takes 30–45 days to manufacture. However, hardened steel lasts for millions of cycles. Commit to this only when your design is frozen for high-volume toy production processes.
Why You Need This Step
3D printing cannot simulate physics. Liquid plastic shrinks as it cools inside a mold.
Aluminum tooling reveals these "hidden" behaviors. It proves that snap-fits, living hinges, and screw bosses will actually hold up under real injection pressure. It also exposes cosmetic issues, showing you exactly where gates (entry points) and ejector pin marks will appear on the final toy.
Mini-Checklist: What to Prepare
Before you request a toy ODM/OEM quote for tooling, have these items ready:
- DFM Review: Confirm wall thickness is consistent to prevent warping.
- Draft Angles: Ensure vertical walls have a taper (usually 1–2°) so the part ejects easily.
- Parting Line Plan: Define where the mold halves meet to hide the seam.
- Texture Notes: Specify polished vs. matte areas using industry standards like SPI finish guidelines.
- Material Specs: Confirm the resin grade complies with CPSC safety requirements.
🚀 Actionable Insight: If you are unsure about sales volume, ask for "P20" steel. It bridges the gap—it is cheaper than fully hardened steel but significantly more durable than aluminum (lasting ~50,000 shots).
7. Toy Tech Pack Creation (Control Art + Specs That Prevent Sampling Mistakes)
Treat documentation as a prototyping method, not just paperwork. A robust Tech Pack aligns your Product Manager, Engineer, and Designer before you pay a deposit.
If you leave a dimension blank, the factory guesses. They will usually guess wrong.
The Manufacturing-Ready Standard
- Control Art: Orthographic views (Front, Back, Side, Top) with exact dimensions in millimeters.
- Bill of Materials (BOM): Lists every screw, resin grade, mechanism, and fabric swatch.
- CMF Specs: Defines exact Pantone (PMS) codes and surface textures. Never use vague terms like "bright red."
- Compliance: Specifies safety tests required for CPC certification and packaging dielines.
Why It Accelerates Prototyping A complete pack eliminates the "assumption phase." It reduces back-and-forth email chains by weeks. When the factory has explicit instructions on assembly and tolerances, they provide accurate quotes immediately. You avoid paying for resamples caused by vague descriptions.
IP and Change Control Your pack must include a revision log. Track every change from v1.0 to v5.0. Define strictly what the factory can modify for Design for Manufacturing (DFM) efficiency and what is locked. This technical rigor is the primary signal suppliers look for when you are finding a toy manufacturer.
8. Pre-Production Samples + Golden Sample Sign-Off
Never approve mass production based on photos. A "navy blue" render often looks purple in sunlight. To prevent a container-load of unsellable stock, you must enforce a physical approval gate.
This process moves through three specific levels of fidelity:
- T1 (Test Shot): The first raw parts from the steel mold. We use these to check mechanical fit and identify sink marks. Color is usually incorrect at this stage.
- PPS (Pre-Production Sample): This unit uses final materials, paint, and packaging. It represents the factory's best attempt at the finished product.
- Golden Sample: The PPS after you approve it. You sign and date this physical unit. It becomes the "law" for the assembly line.
The LeelineToys Workflow
We enforce a strict protocol: Mass production never begins without a signed Golden Sample. Digital files allow for interpretation; a physical box on the QC manager's desk does not. Our team uses your signed unit to calibrate the line. If a production unit does not match the Golden Sample, it fails.
What The Golden Sample Locks In
- Material: Exact chemical grades (e.g., verifying phthalate compliance in PVC).
- Function: Joint friction, button clicks, and assembly feel.
- Packaging: Box thickness, insert trays, and label placement.
Final Compliance Check
Use the PPS for final lab testing. Unlike 3D-printed prototypes, the PPS reacts accurately to drop tests and torque tension. This confirms adherence to standards like ASTM F963 and allows you to finalize age grading guidelines and your Children's Product Certificate.
Need a factory that manages this safety gate for you? Contact LeelineToys.
People Also Ask About Toy Prototyping Methods
1. Which toy prototyping method is best for mechanical fit—SLA, FDM, CNC, or casting?
CNC Machining is the superior choice for verifying mechanical fit and assembly. Unlike 3D printing which builds parts in weak layers, CNC cuts from a solid block of engineering plastic like ABS or Delrin.
This ensures the part has isotropic strength and holds tight tolerances in line with ISO 2768 standards. Use SLA printing only for visual checks or doll faces. If you need to test active snap-fits, screws, or load-bearing gears, CNC provides the structural truth you need before you spend money on steel molds.
2. How do prototypes support ASTM F963 / EN71 readiness?
You use prototypes for early hazard discovery, not for final certification. 3D printed resins are chemically different from production plastics and are often too brittle to pass standard impact tests. However, prototypes allow you to identify "Small Parts" risks or sharp edges defined by CPSC safety standards early in the design phase.
This prevents you from baking dangerous features into the final mold. Note that strict testing rules depend heavily on the target age group. Review our toy age grading guidelines to match your prototype tests to the correct safety class.
3. How many parts can I get from a silicone RTV mold before it wears out?
You should realistically expect only 15 to 25 quality parts per mold. The chemical reaction of curing urethane resin generates heat that slowly damages the silicone surface.
This causes the mold to become brittle and eventually tear during demolding, especially if your toy has deep undercuts or complex textures. You can extend mold life slightly by using release agents, but silicone is a consumable tool. Always budget for multiple molds if you plan a pilot run larger than 30 units.
4. What's the difference between soft tooling and hard tooling for toys?
The difference lies in speed, cost, and lifespan. Soft tooling (aluminum) costs roughly 40% less and is ready in two weeks.
It is ideal for validating your Pre-Production Sample (PPS) and running pilot batches of up to 2,000 units. Hard tooling (hardened steel) takes 45 days to cut but lasts for millions of cycles.
You should upgrade to hard tooling only after you have approved the Golden Sample and secured high-volume retail orders. This strategy protects you from sinking capital into expensive steel molds that might require engineering changes later.
5. What documents do I need before a China factory can quote and start sampling?
You must provide a complete Tech Pack, Bill of Materials (BOM), and 3D CAD files (STEP format). Factories cannot provide accurate pricing based on rough sketches alone.
Your BOM plays a critical role in safety compliance because it tells the factory exactly which chemical grades of plastic to source. If you do not specify this early, you risk using materials that fail mandatory lab tests. Read our guide on the Children's Product Certificate to understand why correct documentation is legally required for import.
Ready to move from prototype to production with a factory partner? Contact our engineering team today.