Most advice on custom toy manufacturing stops at "find a supplier." It ignores the engineering reality: steel molds take weeks to cut, and you cannot rush physics.
Whether you are an entrepreneur designing small-batch plushies or a brand owner coordinating mass-market injection molding, the gap between a prototype and a shelf-ready product is vast. Real production involves navigating strict safety standards like ASTM F963 and managing fixed tooling costs that impact your bottom line.
This guide strips away the sales fluff to show you exactly how the factory floor operates. By the end, you will have a repeatable SOP and a checklist to manage briefs, quotes, and compliance with confidence.
Prerequisites
Estimated Time: 3–6 Months | Difficulty: Intermediate
Physical manufacturing punishes ambiguity. To prevent costly tooling errors and rejected shipments, finalize these specifications before requesting a quote.
- Target Market: Decide your destination (US, EU, or UK) immediately. This dictates your mandatory testing regime: ASTM F963 (US) vs. EN71 (EU).
- Strict Age Grading: Classify as 0–3 years or 3+ years. A 0–3 designation bans small parts and strictly regulates materials to prevent choking hazards.
- Product Lane: Manufacturing lines differ by material. Commit to Plush (sewing/stuffing), Injection Molding (high tooling cost ABS/PP), or Vinyl (rotocasting).
- Factory-Ready Brief: Define concept dimensions, Target Unit Price (Landed), and Target MOQ.
- Review Capacity: Ensure a stakeholder is available to approve physical samples, colors, and finishes within 24 hours to avoid production delays.
- Compliance Budget: Allocate $500–$2,000 per SKU for mandatory third-party lab testing.
Note: If you are still deciding which manufacturing path fits your business model, read our guide on how to find a toy manufacturer.
Custom Toy Manufacturing Steps
Step 1: Crystallize the Product Definition
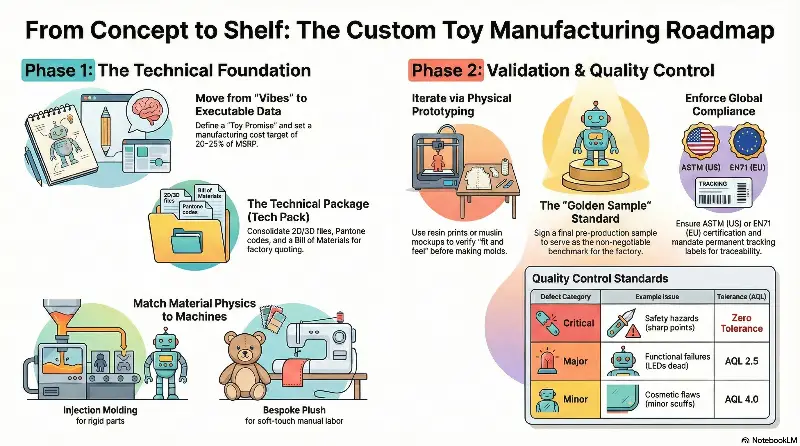
Factories cannot manufacture a "fun vibe." They require rigid specifications to calculate mold steel usage and material costs. Translate your concept into executable data before contacting a supplier.
1. Write a Toy Promise: Define the physical action and payoff in one sentence (e.g., "A 10-inch plush that vibrates when hugged").
2. Define Constraints & Risks
- Age Grade: Choose 0–3 (Strict safety rules, no small parts) or 3+ (Standard compliance).
- Target Cost: Set your MSRP, then target a manufacturing cost of 20–25% of that price.
- MOQ: Determine your budget for inventory (e.g., 500 vs. 5,000 units).
3. Validate the Market: Analyze 3–5 competitors on Amazon. Note their materials, packaging size, and negative reviews to find your opening.
4. Check Intellectual Property: Run a basic search on the USPTO Trademark Database to ensure your name is clear.
🚀 Actionable Insight: If targeting Ages 0–3, minimize painted surfaces. Use colored injection-molded plastic to eliminate lead paint compliance risks during testing.
Step 2: Select the Manufacturing Route Based on Physics
Select your production lane based on material physics and tactile requirements, not just geography. Match your design to the correct machine:
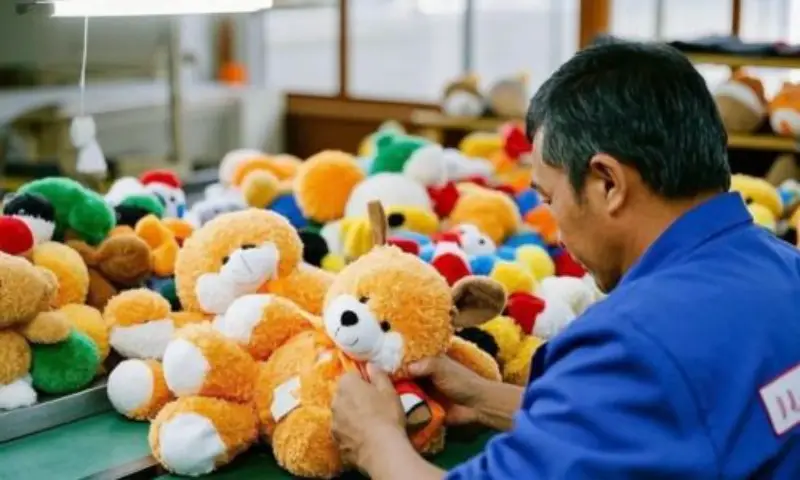
- Bespoke plush (Cut & Sew): Choose for soft-touch skins and density. Validates pattern making, seam strength, and embroidery. Tooling costs are minimal, but manual labor increases unit price.
- Plastic injection molding (ABS/PP): Mandatory for rigid bodies, snap-fits, and moving parts. Requires steel tooling. Expect high upfront costs ($3,000+) but rapid cycle times and low unit costs.
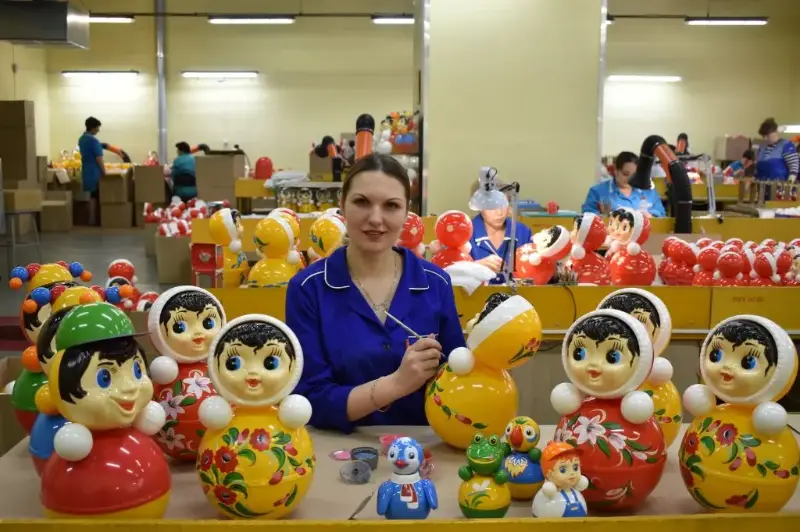
- Custom vinyl (Rotocasting): Use for collectibles requiring a softer squeeze (PVC) and complex paint finishing.
- Small batch (Resin/3D Print): Best for validation runs under 500 units. Uses silicone molds or print farms. Unit costs are higher, but you avoid capital-intensive metal tooling.
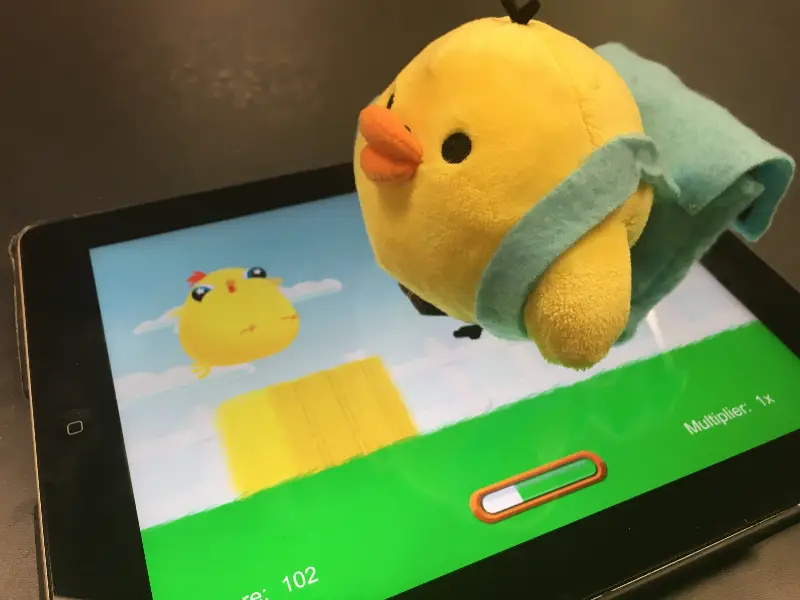
Define Assembly Needs: If your product requires electronics or mixed materials (e.g., rigid eyes on plush), confirm the facility has dedicated Assembly lines to integrate components.
Step 3: Compile the Technical Package (Tech Pack)
Factories cannot quote "vibes"; they quote geometry, material volume, and machine time. To bypass agent markups and "quote chaos," you must translate your concept into a Technical Package (Tech Pack). This blueprint directly drives the CNC machining and EDM (Electrical Discharge Machining) processes used to cut steel molds.
Create a secure digital folder containing these mandatory artifacts:
- 2D Control Drawings: Provide front, side, and back orthographic views with strict metric dimensions (mm).
- 3D Assets: Include .STEP or .IGES files for hard goods.
- Bill of Materials (BOM): List every component—fabric weights (GSM), stuffing type, fasteners, and Pantone C codes.
- Packaging Dielines: Include concepts for boxes or blister packs to calculate shipping volume.
Verify Design-for-Manufacturing (DFM): Before submitting, audit your design for physical feasibility:
- Injection Molding: Ensure uniform wall thickness to prevent "sink marks" and apply draft angles so parts eject cleanly from the press.
- Plush: Verify seam allowances are sufficient to withstand stuffing machine pressure without bursting.
- Vinyl: Simplify paint masks. Complex manual painting significantly increases unit costs.
Step 4: Execute Structured Prototyping
A CAD file cannot predict playability. You must iterate through physical samples to validate mechanical "fit and feel" before committing capital to steel molds.
- Select a material-accurate method:
- Plush: Progress linearly: Paper Pattern > Muslin Mockup (to verify volume) > Soft Sample (final fabric).
- Plastic/Vinyl: Use SLA (Resin) printing rather than FDM. Resin provides the smooth surface finish required to accurately test paint adhesion and assembly tolerances.
- Run sensory verification tests:
- Fit: Snap-fits must engage with a clean, audible click.
- Feel: Plush stuffing must rebound immediately after squeezing; coatings must not feel tacky.
- Function: Moving parts must cycle repeatedly without grinding or jamming.
- Perform safety stress tests: Drop the prototype from 1 meter onto a hard surface. If the unit fractures or creates small debris, reinforce internal bosses immediately. Consult the CPSC Small Parts Guide to ensure compliance design.
🚀 Actionable Insight: Maintain a physical "Revision Log" (Rev A, Rev B). If a factory later claims a production defect is "unavoidable," use your Golden Sample as the non-negotiable standard of truth.
Step 5: Shortlist and Qualify Suppliers by Process
Filter suppliers by process match. Plush factories (or USA alternatives) cannot execute vinyl molding or die-cast cars.
- Verify Portfolio: Request photos of steel molds and equipment, not just finished goods.
- Test Engineering: Require DFM (Design for Manufacturing) feedback on your Tech Pack. Real partners highlight risks; middlemen accept anything.
- Audit QC: Confirm adherence to AQL (Acceptable Quality Limit) standards for incoming and final inspections.
- Confirm Lab Access: Ensure direct coordination with 3rd-party labs for compliance testing.
- Demand Transparency: Schedule a live video tour. If they refuse to show the production floor, disqualify them.
Step 6: Request Detailed Quotes and Commercial Terms
Request a formal, itemized quotation (PDF or Excel) from your shortlisted manufacturers. Reject informal lump-sum estimates sent via chat apps.
Mandate the following line items to ensure transparency:
- Tiered Unit Pricing: Request costs for your pilot MOQ (e.g., 500 units) versus scale (e.g., 5,000 units), including Packaging and assembly.
- Tooling & NRE: Separate one-time costs for Molds, Paint Masks, and Sample Fees.
- Commercial Terms: Define payment milestones (e.g., 30% deposit) and Incoterms. Consult the ICC Incoterms Rules to choose between FOB (shipping liability ends at the port) and DDP (delivered to your door).
- Mold Ownership: Explicitly state that you retain full ownership of the molds upon final payment.
Step 7: Manage the Sampling Funnel and Define QC Specs
Treat sampling as a strict elimination round. Refine T0/T1 trials into a perfect Pre-Production Sample (PPS) before authorizing mass volume.
- Execute the approval funnel.
- Injection Molding: Correct dimensional errors on T1 trials first. Only approve surface texturing (e.g., VDI 3400) once mechanical parts fit without forcing.
- Plush: Approve embroidery files and stuffing density to ensure proper posture before authorizing final sewing.
- Sign the 'Golden Sample'. Sign and date two copies of the final PPS. Keep one for your archives and station the other on the factory floor as the non-negotiable physical standard.
- Codify defect tolerances. Create a spec sheet using ISO 2859-1 AQL standards:
- Critical: Safety hazards (sharp points, choking risks). Zero tolerance.
- Major: Functional failures (LEDs dead, seam rupture). Target AQL 2.5.
- Minor: Cosmetic flaws (scuffs, oversight). Target AQL 4.0.
- Script sensory verification. Define accessible pass/fail cues.
- Visual: "Verify 'CE Mark' is legible on the base," rather than "Check for the blue stamp."
- Physical: Perform 3M Tape Rub tests on logos, verify seams withstand a pull test, and ensure no chemical odor exists upon unboxing.
Step 8: Enforce Regulatory Compliance and Execute Mass Production
A container stuck in customs is not inventory; it is a liability. You must translate abstract safety standards into physical manufacturing disciplines before the presses cycle.
1. Plan compliance by market: Schedule third-party lab testing (e.g., SGS, Intertek) immediately after Golden Sample approval.
- US: Verify ASTM F963 (mechanical hazards) and CPSIA compliance. Mandate permanent Tracking Labels (batch ID, location, date) on every unit for traceability.
- EU: Certify against the EN71 series and REACH chemical standards. Apply the CE Mark only after passing the Technical File audit.
2. Validate eco-friendly materials: If claiming sustainability, documentation is mandatory. Require FSC-certified paper for inserts and soy-based inks. If using recycled plastics (rPET), demand a GRS (Global Recycled Standard) certificate to prove material provenance.
3. Execute sensory QC checks: Establish a physical control plan for the final pack-out:
- Visual: Verify cartons display clear shipping marks (Net Weight, SKU, Country of Origin) on two adjacent sides.
- Tactile: Check that polybags have air holes (suffocation safety) and master cartons use the "H-tape" sealing method to prevent moisture.
- Auditory: Shake the sealed retail box. If components rattle, the internal blister pack requires reinforcement.
🚀 Actionable Insight: Manufacturing is high-stakes. If you need a partner who handles engineering, compliance, and production under one roof, contact LeelineToys' engineering team to review your project feasibility today.
FAQs About Custom Toy Manufacturing
1. How much does it cost to manufacture a custom toy?
Total investment varies by material and mechanism. For plush toys, upfront costs are low (prototyping ~$100–$300), but unit labor costs are higher.
Injection molding requires significant capital for steel tooling ($3,000–$10,000+) but offers lower unit costs at scale. Always budget an additional $500–$1,500 per SKU for mandatory CPSIA or EN71 safety testing.
2. How long does the toy manufacturing process take?
A typical timeline is 3 to 6 months from concept to delivery. Prototyping requires 2–4 weeks, steel mold production takes 30–45 days, and mass production runs 30–60 days.
Shipping adds another 30–45 days via ocean freight. Rushing "physics" (cooling times or glue curing) often results in quality defects.
3. Do I need a patent to manufacture a toy?
You do not need a patent to start, but you must avoid infringing on existing IP. Search the USPTO database for trademarks. To protect your own design, sign a Non-Disclosure Agreement (NDA) with your manufacturer and ensure your contract explicitly states that you own the molds upon payment.
Conclusion
You now possess the operational blueprint to move from a napkin sketch to a warehouse-ready product. "Done" is not just a finalized CAD file; it is an approved design package, a rigorously tested Golden Sample, and a signed contract with a factory that understands your compliance needs. Success looks like a labeled, carton-ready production sample that matches your prototype exactly—same feel, same color, same fit.
Ready to cut steel and start production? Contact LeelineToys today to speak directly with an engineer about your project.